Title: Homemade Lotion Bars Using Shea Butter and Beeswax: A Comprehensive Guide
Introduction:
In today’s world, with the increasing focus on natural and organic products, creating homemade lotion bars using shea butter and beeswax has become a popular DIY skincare trend. These lotion bars are not only eco-friendly and cost-effective but also provide a multitude of benefits for your skin. In this article, we will delve into the reasons why you should consider making your own lotion bars and provide you with a step-by-step guide on how to create them.
Benefits of Homemade Lotion Bars:
1. **Natural Ingredients**: One of the main reasons to opt for homemade lotion bars is the use of natural ingredients like shea butter and beeswax. These ingredients are free from harsh chemicals and preservatives commonly found in store-bought lotions, making them safe for all skin types.
2. **Moisturizing Properties**: Shea butter is known for its deeply hydrating properties, while beeswax helps to lock in moisture, making these lotion bars extremely nourishing for the skin.
3. **Customizable Scents**: By making your own lotion bars, you have the freedom to customize the scents with essential oils of your choice, creating a personalized skincare experience.
4. **Eco-Friendly**: Homemade lotion bars reduce your carbon footprint as they eliminate the need for plastic packaging and transportation associated with store-bought lotions.
How to Make Homemade Lotion Bars Using Shea Butter and Beeswax:
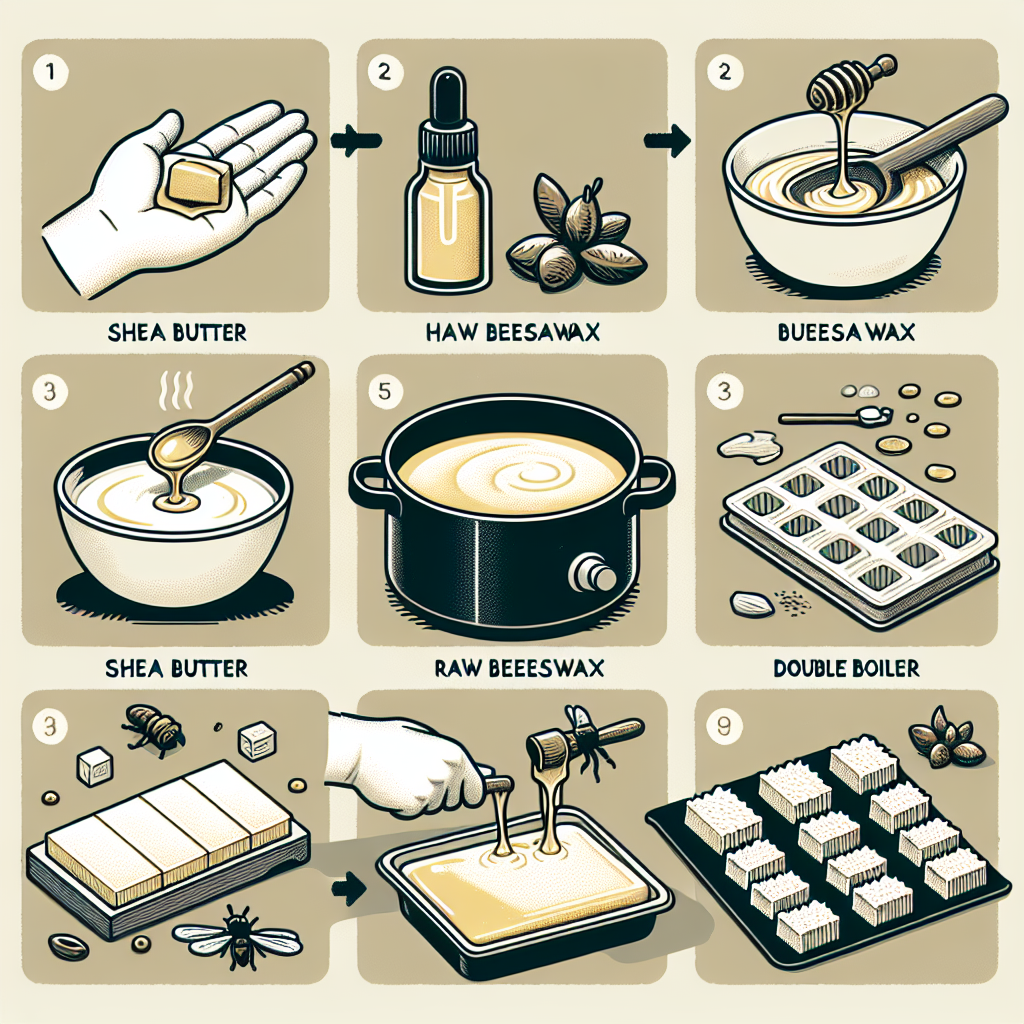
1. **Gather Your Ingredients**: To make homemade lotion bars, you will need shea butter, beeswax, coconut oil, and essential oils for fragrance. You can easily find these ingredients at your local health food store or online.
2. **Melt the Ingredients**: In a double boiler, melt the shea butter, beeswax, and coconut oil together until they are fully combined. Stir the mixture continuously to ensure even melting.
3. **Add Essential Oils**: Once the ingredients are melted, remove the mixture from heat and add your desired essential oils for fragrance. Lavender, citrus, and peppermint are popular choices for lotion bars.
4. **Pour into Molds**: Carefully pour the mixture into silicone molds or an ice cube tray, ensuring even distribution. Allow the lotion bars to cool and harden for several hours or overnight.
5. **Remove from Molds**: Once the lotion bars have hardened, gently pop them out of the molds. Your homemade lotion bars are now ready to use!
FAQ:
Q: Can I use other oils instead of coconut oil?
A: While coconut oil is a popular choice for homemade lotion bars due to its moisturizing properties, you can experiment with other oils like almond, jojoba, or olive oil to customize the formula based on your skin type and preferences.
In conclusion, creating homemade lotion bars using shea butter and beeswax is a rewarding and beneficial DIY skincare project. By using natural ingredients, you can nourish your skin while reducing your environmental impact. Follow our simple guide to make your own customized lotion bars and enjoy the numerous benefits they offer.